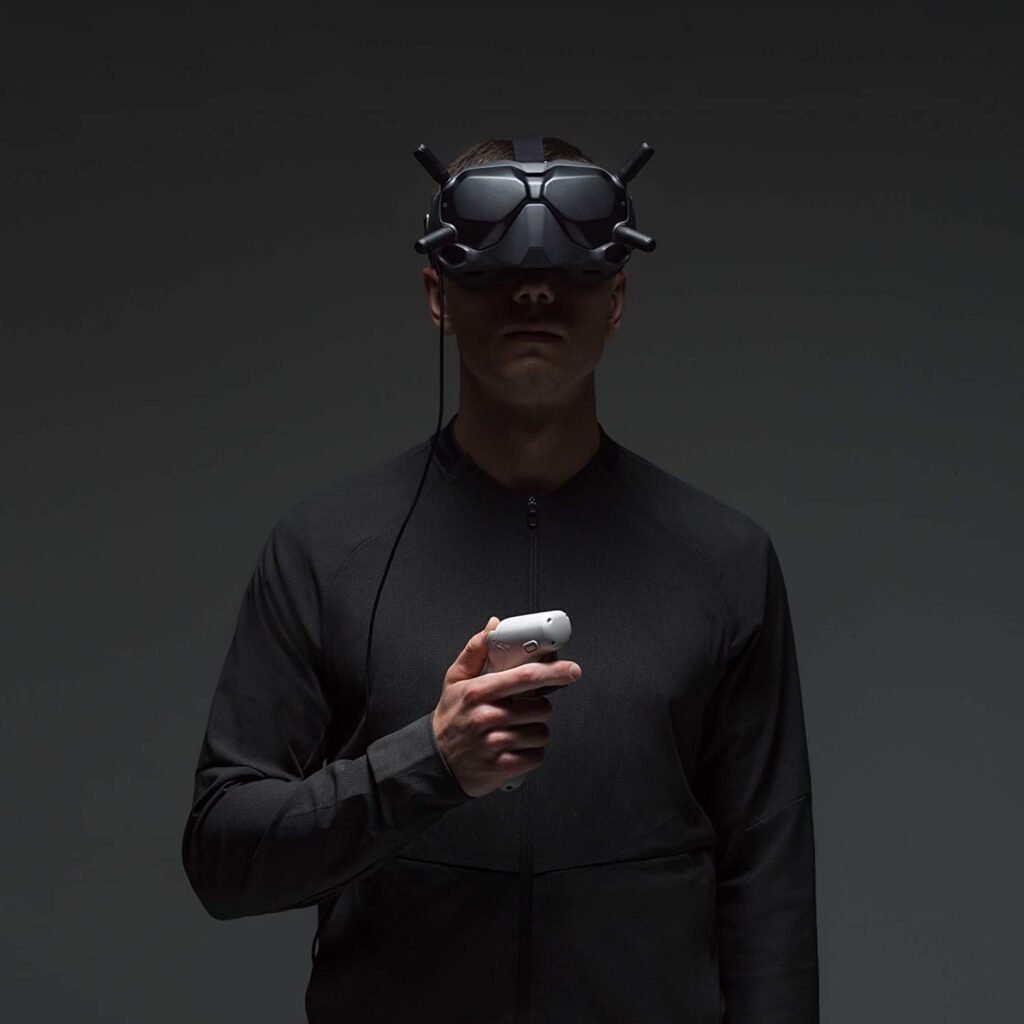
This tutorial is solely about the motion controller of DJI FPV and how to master it. If you have not flown an FPV drone, it is going to give you a hard time or you might end up crashing it into a concrete block or a tree. So read this before piloting a DJI FPV drone. Read through this post to understand Motion controller buttons, functions and tips to master it.
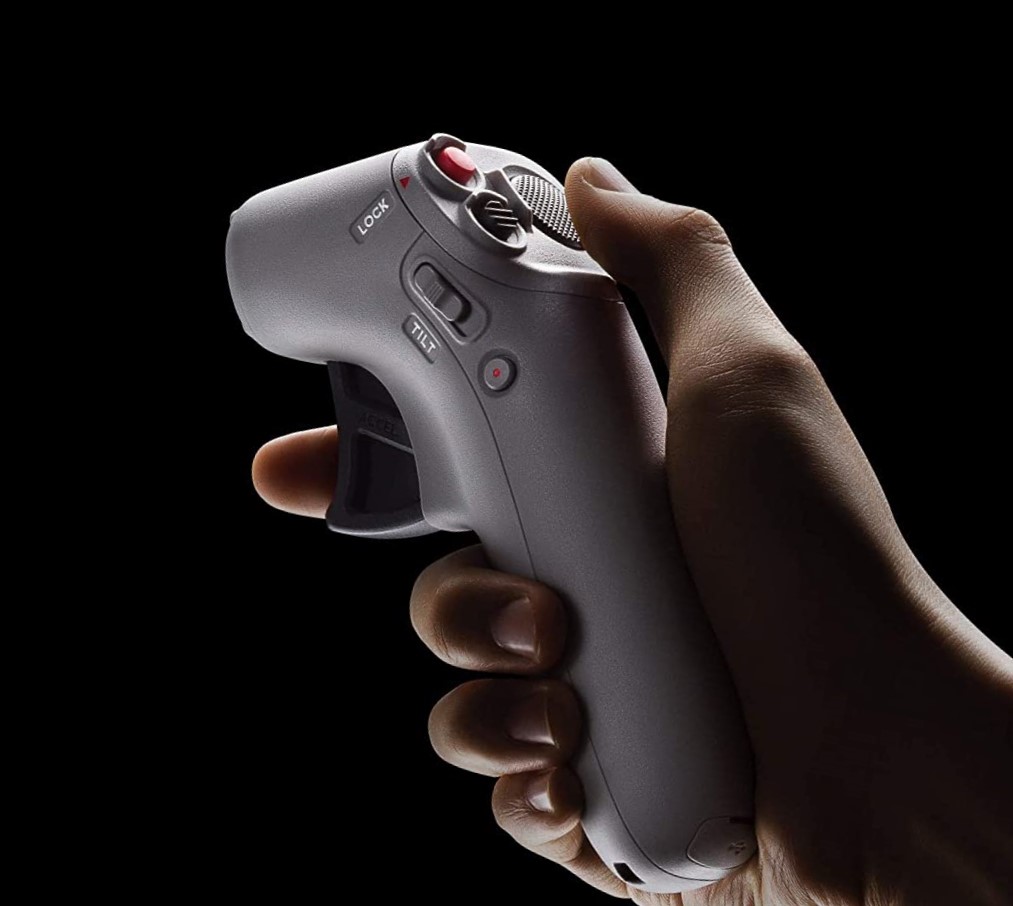
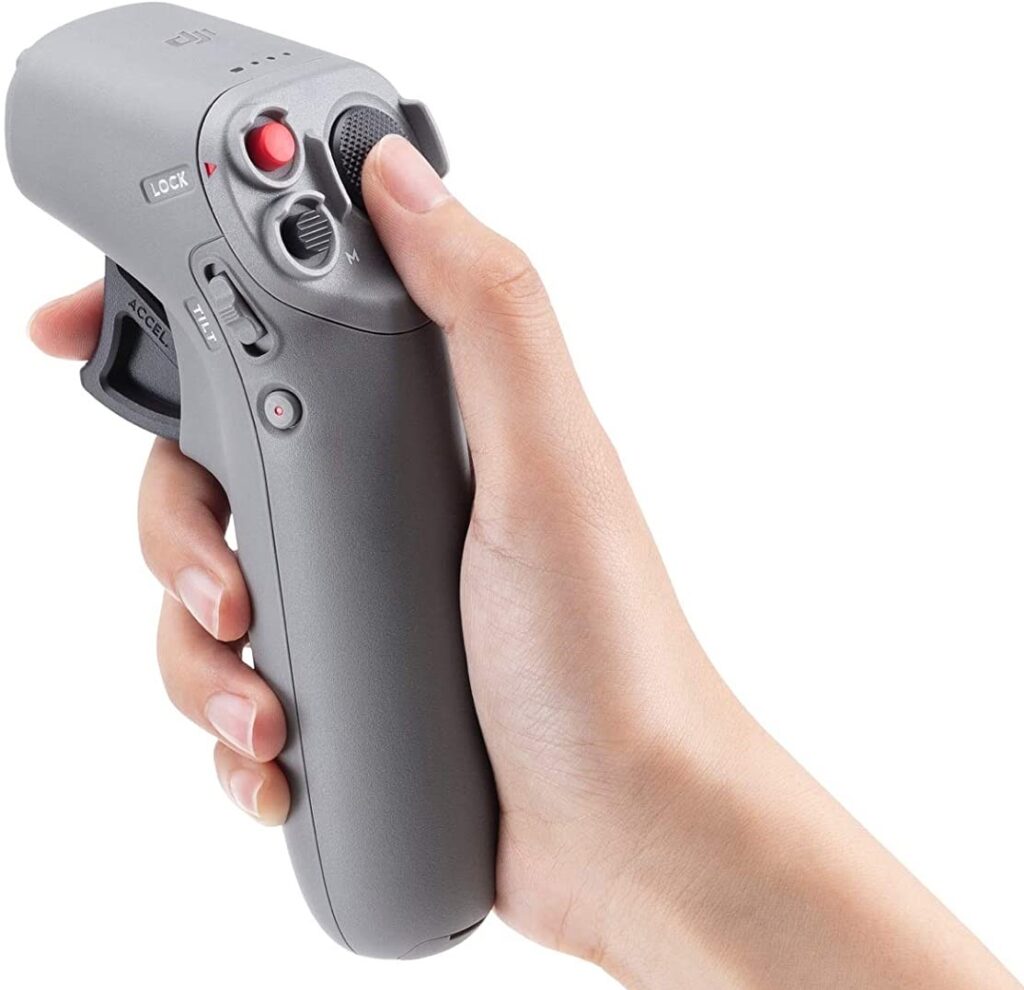
Power on – To power on our motion controller we need to press the power button once and then hold it for approximately 2 seconds to turn it on or off. The power button is on its right side.
Charging – We need to use its USB-C port which is at the bottom for charging it. It is necessary to check it for charging before using it on our FPV drone otherwise we can face the problem in the middle of the flight.
If you are not sure how to check the battery level for the first time of your FPV motion controller just press the power button on the right side of it once to check the battery level. You will come to know how much battery power is left.
Motion Controller Firmware Update – It requires firmware updating. We will use the same USB-C port that we use for charging to connect it to our PC for firmware update. The firmware update will save us from a lot of trouble. So make sure that the FPV motion controller’s firmware is updated.
Accelerator – It is necessary to understand the motion controller buttons, and the drone safety highly depends on its accelerator. We can find the accelerator of our FPV controller on its outward-facing side.
We need to press the accelerator to move our FPV drone forward, the more pressure we apply on it, the faster it will go or vice versa. We can use it to pilot the drone smoothly. So basically the entire speed of our drone is dependent on it.
In order to stop flying forward we need to release the accelerator slowly and the drone will stop advancing forward anymore.
Buttons on The Backside of The FPV Motion Controller
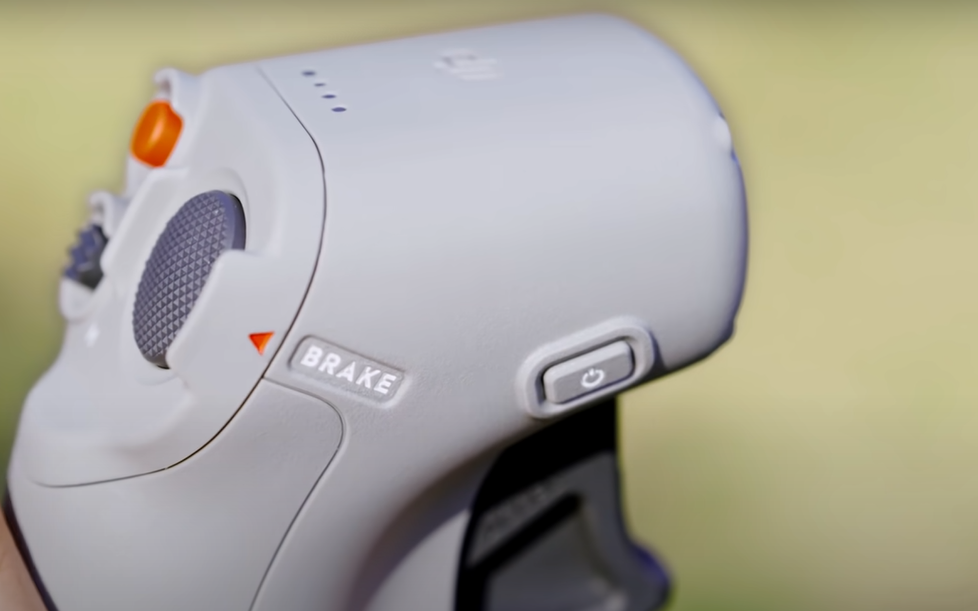
On the backside of the controller we will see 3 main buttons which control the dynamics of our FPV drone. We need to understand each one of them equally well. These buttons are Lock, Brake and Mode buttons.
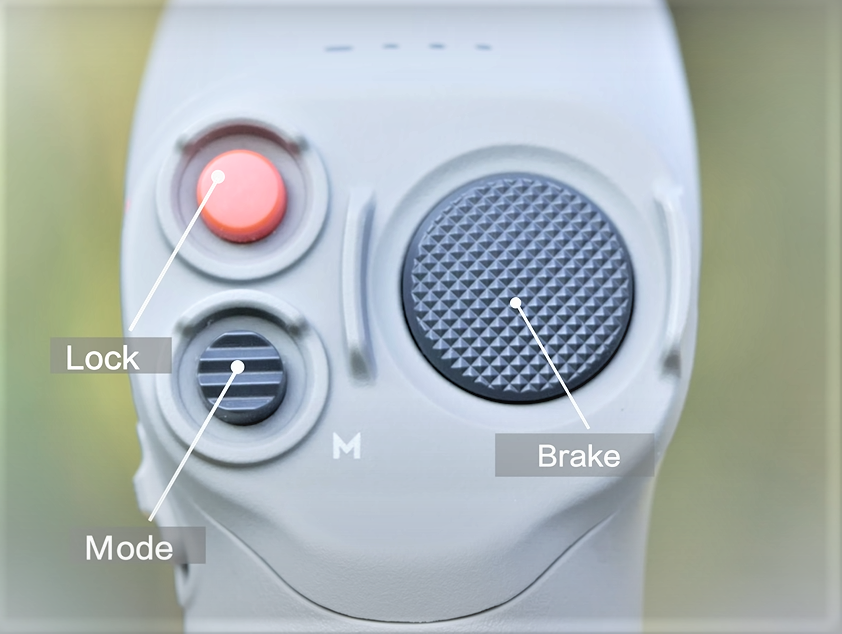
- Lock Button is used to make the drone take of or land back
- Brake Button is used for three things: either we need to apply emergency brakes to stop the drone immediately, we need the drone to hover on an object or just for the sake of RTH (Return to Home). We can do all these three things with a single button, imagine how important it’s to know its basics before making your first FPV drone flight.
- The Mode button is used as we can guess from its name to change the aircraft Mode. We need to press it once to shift between the modes. We will get around it after using it a few times.
Record and Gimbal Tilt Slider Buttons
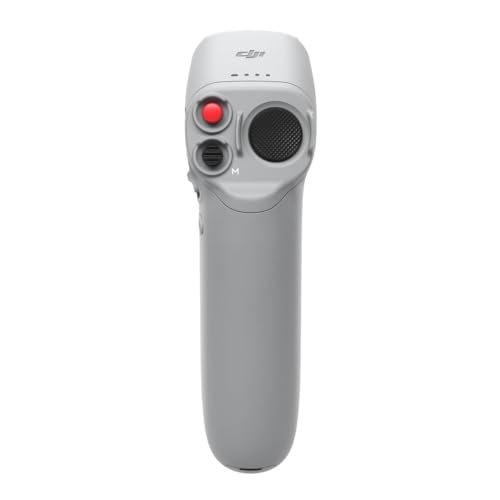
We will find two very important buttons on the left side of our DJI FPV Motion Controller–Gimbal Tilt Slider and Shutter or Record button. They both are equally important to understand with their uses before flying DJI FPV drone:
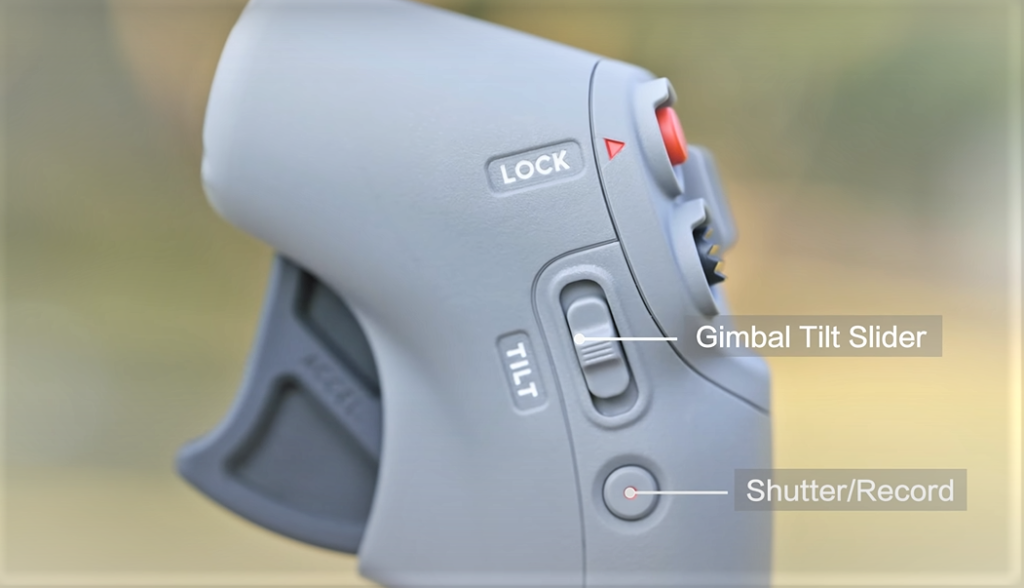
- The Gimbal Tilt Slider is used to adjust the gimbal tilting simply.
- The Record/Shutter button is used to record videos or take pictures. We need to press it once to take our first drone picture or record our first drone video on FPV.
Linking Motion Controller Goggles And FPV Drone
So this one is very important to understand because if we miss this we may end up getting frustrated. We need to link our motion controller to the FPV drone.
First Thing – Before linking the FPV drone to the controller make sure it’s linked to the Goggles and the batteries of all devices are more than 50%.

Second thing – We need to press-hold the aircraft power button and soon we will see the battery level indicator will blink in sequence.
Third thing – Use the same method to link the motion controller to the FPV aircraft press-hold power button until it blinks in sequence and beeps continuously. We will know that it’s linked to the drone. The beeping and battery level indicators will stop once it’s fully synced to the drone.
Activation and Firmware update
Once our devices are linked now we will activate them. To do that is use the USB-C port on Goggles to connect to a mobile device with a stable internet connection. Then click the DJI Fly App and follow the instructions. In case we did not update the firmware on the motion controller just click the Firmware update on the top left corner of DJI Flyapp and boom.
First Flight Checklist
- Just before flying make sure that the batteries of Goggles, Motion controller and the DJI FPV aircraft are charged.
- Choose an open area instead of a closed one or with obstructions.
- Make sure the GPS signal is working properly as in some areas it does not
- Check Goggles for warnings
- If everything is intact Press the Lock button twice that will start the aircraft motors and then Press+Hold the Lock button and the drone will start flying and hover the drone a little above the ground level to just get the grip.
- Now press the Accelerator to fly the drone forward the circle you will see on the interface of Goggles. When we tilt the motion controller we will notice the circle on Goggles moving as we tilt.
- Now as we press the Accelerator we will see it flies toward the indicated location by the circle to whatever direction we want it to.We will control the circle by moving up/down unless the color changes. We can fly our drone up/downward after the color change.
- In order to make a turn on a DJI FPV drone press the motion controller accelerator and rotate your wrist and forearm it will change the position of the circle on Goggles and the DJI FPV drone will rotate exactly as the motion controller would.
How To Make A Quick Turn on DJI FPV drone with Motion Controller?
If you want to make a turn, rotate your wrist and forearm to move the circle on the screen to the left or right. Press the accelerator and DJI FPV drone will fly towards the circle then tilt the motion controller while pressing and the drone will turn slowly. In order to make a quick turn, move the device quickly to 180 degrees and you will see the drone doing the same. It depends on the movement of our forearm and wrist to make turns.
Smart Return to Home
So when we want our DJI FPV drone to return home safely. First we need to make sure that the Home Point location has not been changed or have an obstacle that we noticed recently. If everything is good Press-Hold the Brake button on the motion controller and the DJI FPV aircraft enter the smart Return Home Mode automatically.
Final Thoughts
Although we have mentioned everything in detail about making the best use of DJI FPV motion controllers to fly the aircraft properly. We need to understand that for everything we need to check the batteries first whether or not they have charged. Understand that the GPS precision on drones is limited so use them as advised. For any other action we might end up losing or damaging our drone. That was all about using the motion controller on our drone and its button functions.
- The DJI Motion Controller offers an entirely new way to fly. It allows the aircraft to maneuver based on your...
- In The Box: DJI Motion Controller × 1, Lanyard × 1
- Compatibility: DJI Avata, DJI FPV, DJI Goggles 2, DJI FPV Goggles V2, DJI Goggles Integra